Improving the look of your MacOS Terminal
Madrid
Since I upgraded my Mac to the latest Mojave build, due to it's Dark Mode I was wanting to change the look of my MacOS Terminal.
So, after searching and going through a few tutorials I have completely changed the look of my terminal, here you will find a tutorial about which steps have I made to change my terminal.
Step 1: Get rid off the default terminal
If we want to choose a different terminal emulator, in MacOS there are two main options:
- iTerm
- Hyper
During this article we're going to focus on iTerm cause it's my terminal emulator's of choice. It offers a wide variety of options and shortcuts. And more important, it has a powerful comunity that feeds the emulator with a wide set of themes. You can check out iTerm here.
On the other hand Hyper is prettier, but it is built using Web Techonologies (HTML, CSS, JS...) and due to it has worse performance in comparison with iTerm. You can check out Hyper here
But if you are an old fashioned dev, you can also use the MacOS default terminal. Most of the improvements that we are going to cover also work in it.
Step 2: Welcome to zsh
The next step we're going to take is change our shell from bash to zsh. ZShell offers a wide variety of improvements such as completion, comand history, etc... And most important it will allow us to install oh-my-zsh.
Although zsh is installed in MacOS by default it's an older version, so I would recomend you to download the latest available version through Homebrew. If you don't have Homebrew (the missing MacOS package installer) installed please check it out here and follow the installation instructions.
-
For installing zsh just run the following command:
$ brew install zsh -
Verify the installation with:
$ zsh --versionThat should return the current version of zsh

-
Change your default terminal to zsh:
$ chsh -s $(which zsh) -
Verify the change of shell with:
$ echo $SHELLThat should print /bin/zsh

Now, that you have moved to the new zsh world you can try a wide variety of plugins, frameworks and themes for your terminal.
NOTE:
After changing your shell to zsh your $PATH variable has been also modified (now it is using the one from zsh). In order to modify it, open the file ~/.zshrc and paste the following line with the content of your old $PATH variable (probably located in ~/.bash_profile)
export PATH={THE CONTENT OF YOUR BASH $PATH}:$PATH
Step 3: "Oh My ZSH!"
At this point you should have installed, iTerm (or Hyper), Homebrew and zsh. Let's install a zsh framework called oh-my-zsh, which will help us to change between themes and manage plugins. You can check it out here.
oh-my-zsh can be installed via curl using this command:
$ sh -c "$(curl -fsSL https://raw.github.com/robbyrussell/oh-my-zsh/master/tools/install.sh)"
But I strongly recommend you to check the latest installation method in their page.
Step 4: Dress up your terminal emulator
Now that we have already installed oh-my-zsh let's configure it and install a theme based in python's powershell called agnoster.
In order to accomplish that we will have to modify the ~/.zshrc file.
-
First of all we will have to install the powerline fonts for our terminal. For that, create a directory and clone the content of the following GitHub repository in it and run the installation script.
$ git clone https://github.com/powerline/fonts.git $ cd fonts $ ./install.sh -
Next we will change the theme of our shell by opening the ~/.zshrc file and modifying the line ZSH_THEME to angnoster
$ open ~/.zshrcNow modify the value of ZSH_THEME to "agnoster" as indicated in the image

-
Change the default font of our emulator
For that, go to the iTerm preferences (⌘,) and in the profiles tab, text, change the font to Meslo LG DZ Regular for Powerline with 14pt of size (You can make your own choiche for the size of the font of your terminal, I use 14pt)

-
Apply the changes our shell
$ souce ~/.zshrc
Step 5: "Plug In Baby"
Now we will install a few zsh plugins, oh-my-zsh offers a wide variety of them and I strongly recommend you to play and try a few of them. However, in this tutorial we will add the following plugins:
-
Install Syntax Highlighting Plugin. This plugin adds beatiful highlighting as you type the commands.
For that you have to clone the following Git repository and copy it to the oh-my-zsh plugins directory.
$ git clone https://github.com/zsh-users/zsh-syntax-highlighting.git ${ZSH_CUSTOM:-~/.oh-my-zsh/custom}/plugins/zsh-syntax-highlighting -
Install zsh Autosugestion Plugin. Wich autosuggest a command as you are typing.
For that you have to clone the following Git repository and copy it to the oh-my-zsh plugins directory.
$ git clone https://github.com/zsh-users/zsh-autosuggestions $ZSH_CUSTOM/plugins/zsh-autosuggestions -
Update your ~/.zshrc configuration file and add the plugins.
For that, add your plugins under the plugin section as it is shown bellow:
plugins=(
    git
    zsh-syntax-highlighting
    zsh-autosuggestions
)
-
Apply the changes to your shell. For that, just run the following command as we have done before.
$ souce ~/.zshrc
Step 6: Colorls
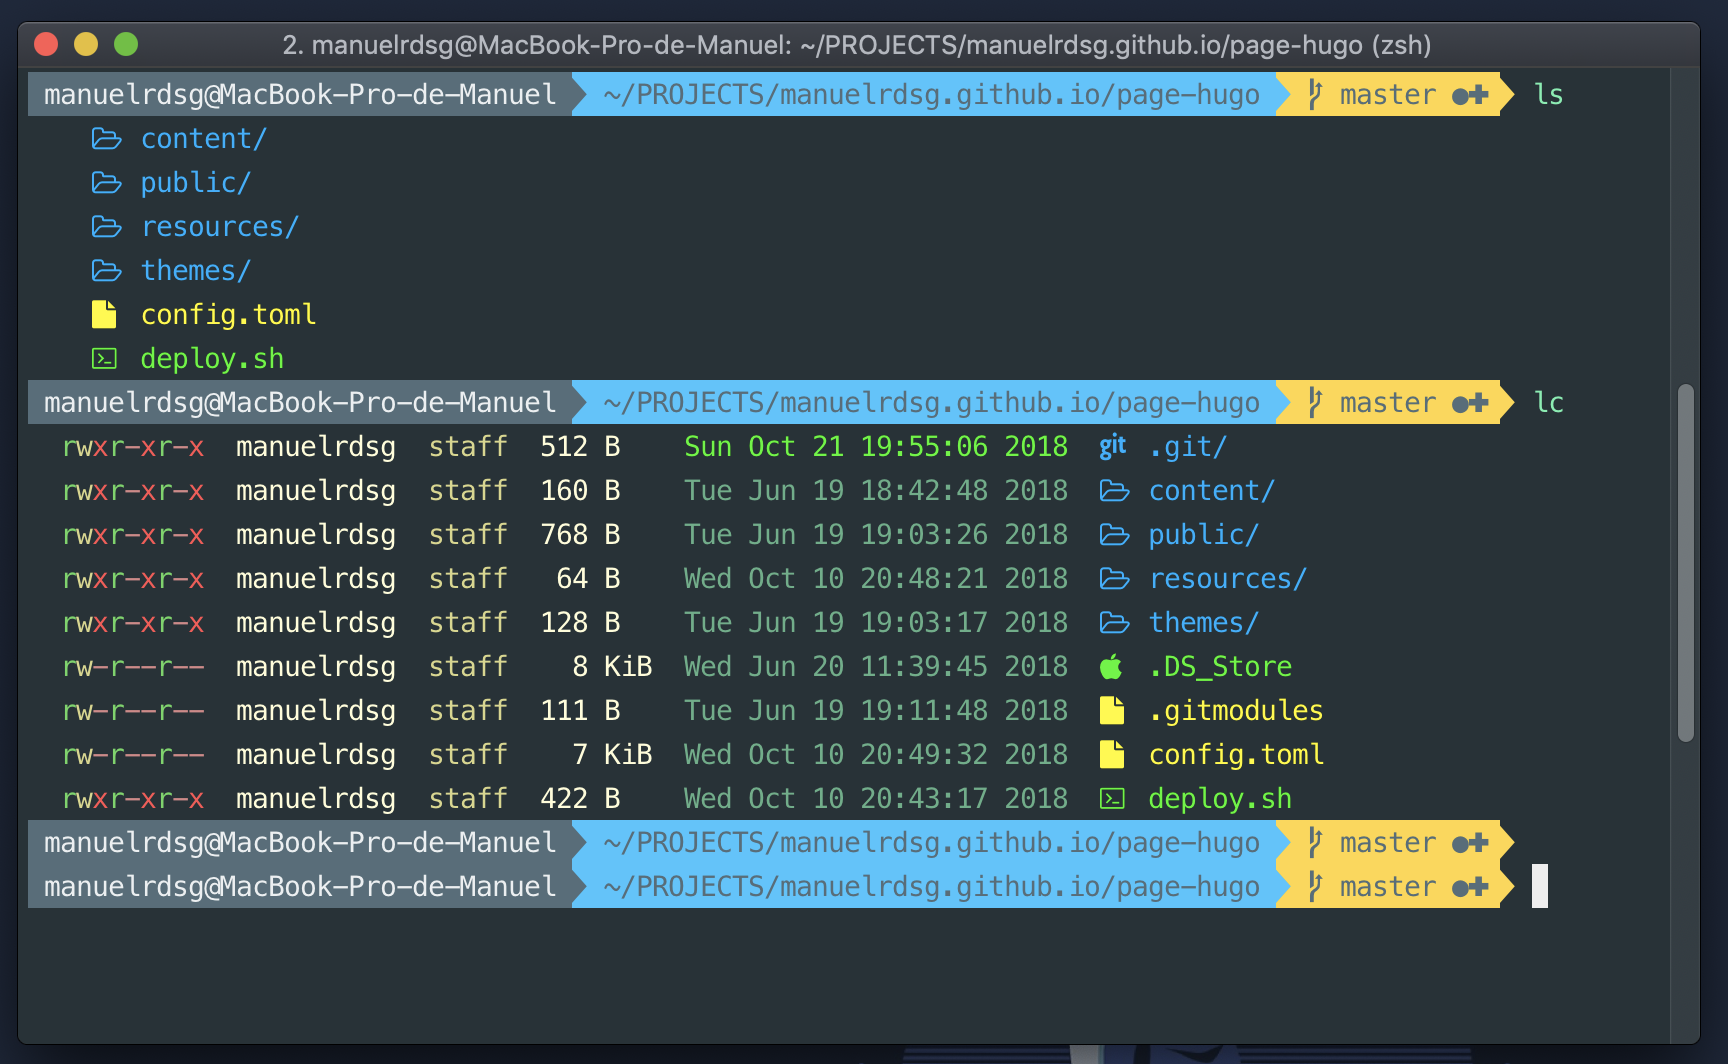
We are going to modify our ls command for using colorls. Colorls is a ruby gem that adds some beautiful icons and colors to the standard ls command.
-
First of all we need to install ruby in order to use the gem installer. It can be installed using the Homebrew package installer:
$ brew install ruby -
Next, we will install colorls using the gem installer.
$ gem install colorls -
In order to use colorls and display the file icons we will have to install the Nerd fonts for non ASCII characters. You can check out the fonts here.
You can follow any of the installation possibilities displayed in their repository readme, but I recommend you to use the Option 4 and install them via homebrew running the following commands.
$ brew tap caskroom/fonts $ brew cask install font-hack-nerd-font -
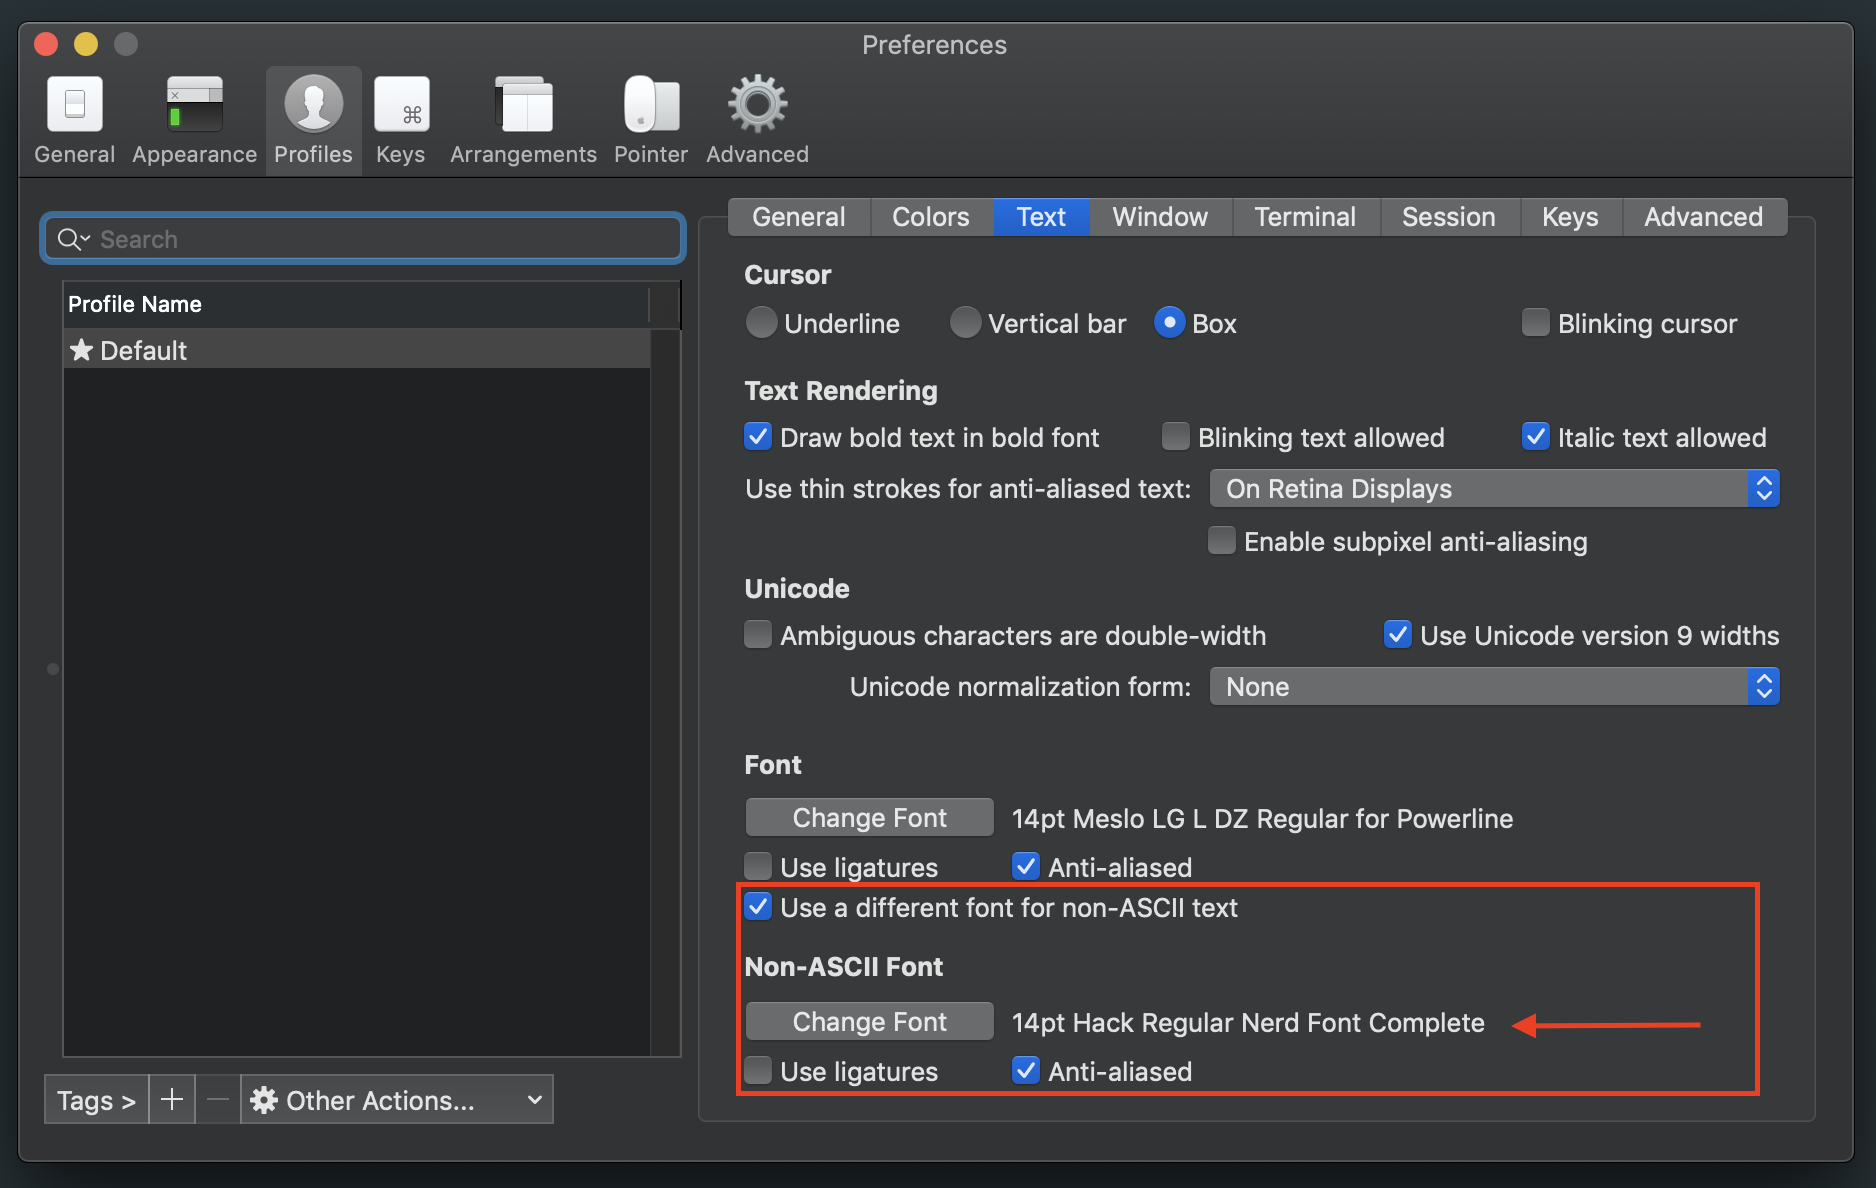
Once the fonts are installed you will have to modify the font for non ASCII characters in your terminal emulator. In this case iTerm2.
For that, go to the iTerm preferences (⌘,) and in the profiles tab, text, change the box "Use a different font for non ASCII characters" and modify the font to Hack Regular Nerd Font Complete with 14pt of size (You can make your own choiche for the size of the font of your terminal, I use 14pt)

-
Add an alias for colorls. If you want colorls to be prompted wvery time you use the ls command you will have to add an alias to the end your ~/.zshrc configuration file. I recommend you to add the following alias:
alias ls='colorls --sort-dirs -1'
alias lc='colorls -lA --sd'
The ls command will now display a vertical list of the directories and files within your directory. The lc command will display more information as the permissions, date of creation or owner.

Conclusions
At this point you should have a fully functional beautiful zsh terminal. In this tutorial it is showed my personal configuration, but there are trillions of different combinations and a wide variety of plugins, frameworks, fonts and themes. I strongly encourage you to try and test a different set of configurations until you feel comfortable with your terminal.
Have a nice day!
Thumbnail and cover images by iterm2-material-desing theme
This post has been crafted while listing to Abbey Road album by The Beatles